January 15, 2025
How to Mind Map – Step by Step
You can create a Mind Map in one of two ways, 1) drawing it by hand or, 2) generating it on a computer using a bespoke software tool such as Ayoa.
While there are no ‘fixed’ rules for Mind Mapping, the following guidelines are designed to make full use of the natural expression of the human brain, utilising all the key elements discussed in this chapter. Before you begin, take a moment to focus on your core question, goal or challenge. Then, get creating!
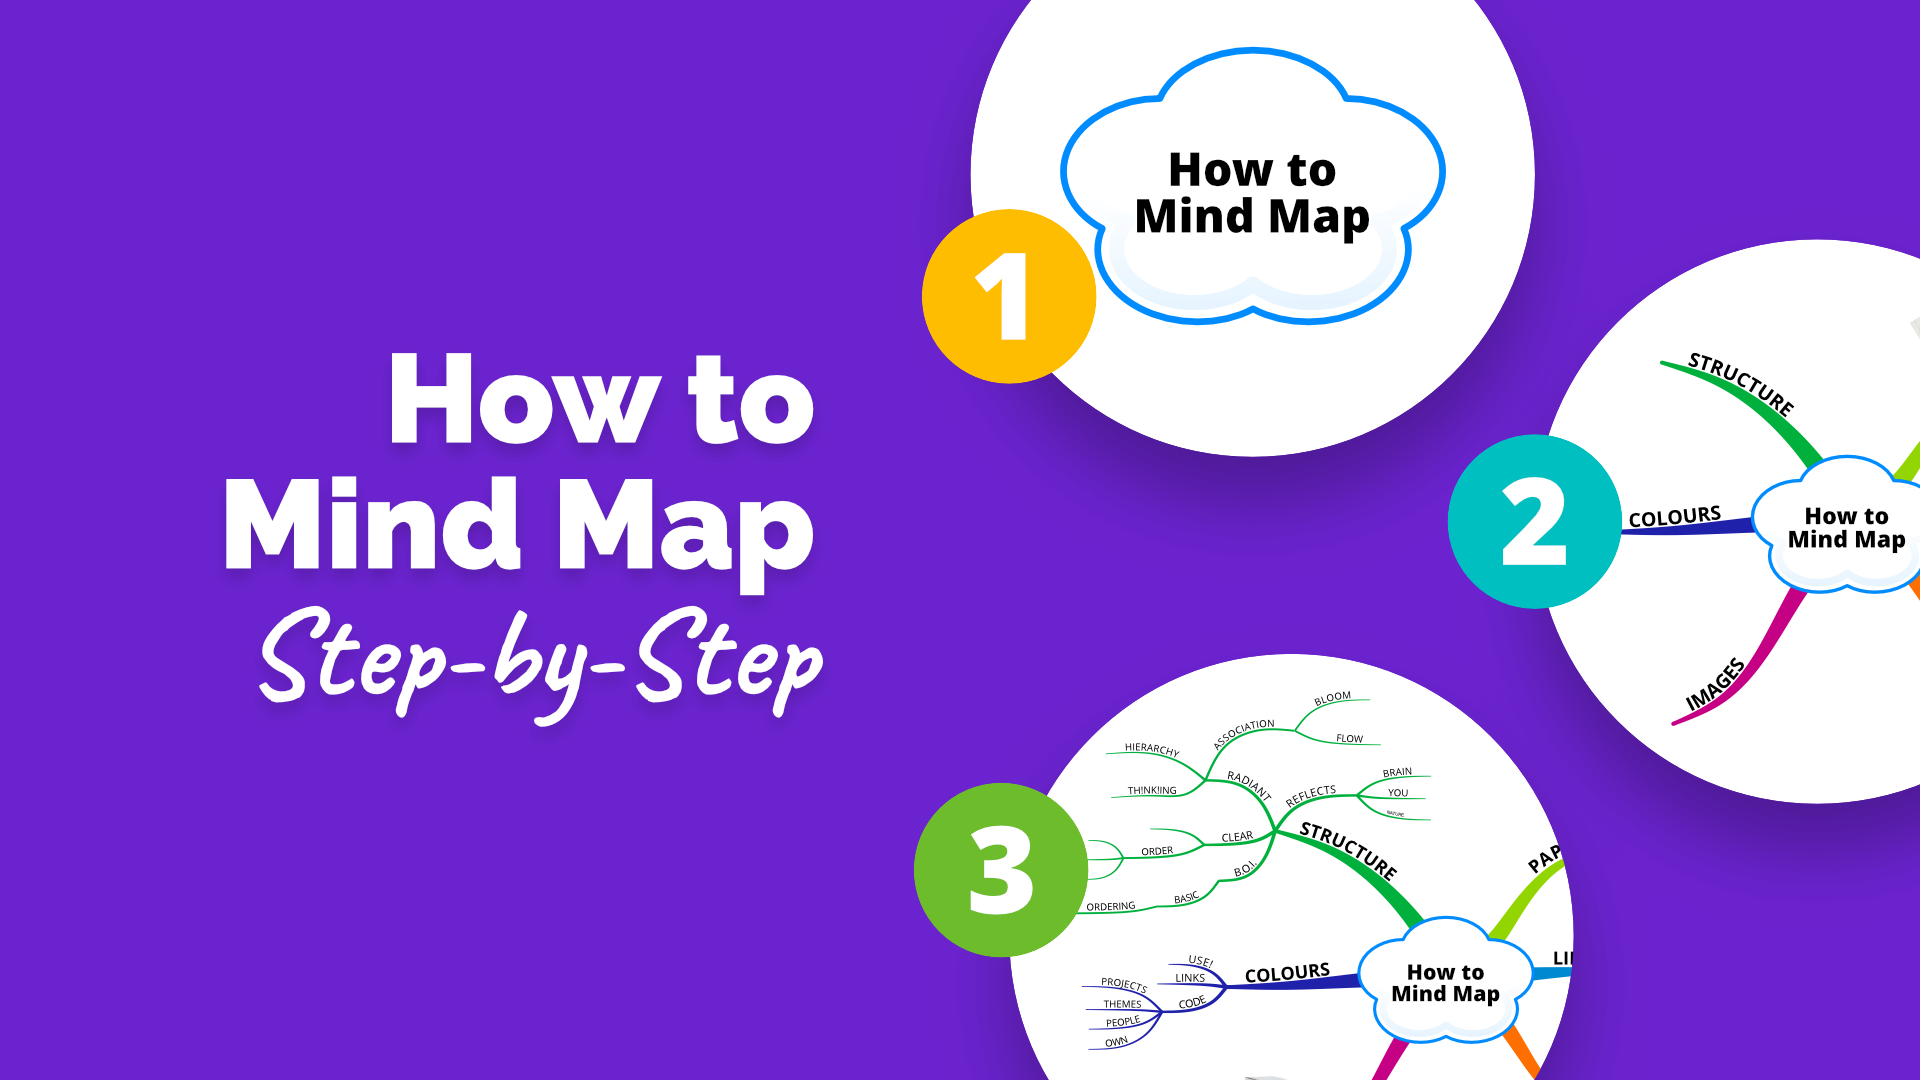
Step 1) Start with a central image
In the centre of a blank sheet of paper create a colourful picture which represents the main subject or theme of the Mind Map. Try using at least three colours to focus the mind, attract attention and stimulate associations. For instance, if you’re creating a Mind Map for career development, you might draw a picture of your ideal vocation or workplace, or anything that represents success and advancement.
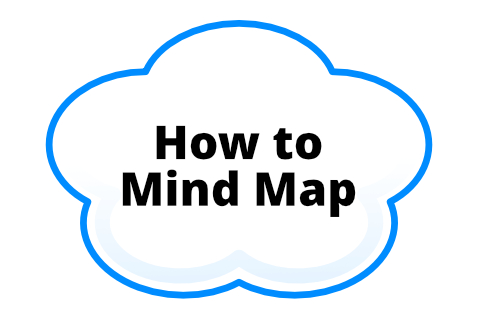
Step 2) Connect the main topics
Next draw thick, organic, flowing lines branching out from the central image. These are your main branches. Allocate one for each of the main topics or ideas that relate to your theme and make sure they are each given a different colour to aid organisation. The branches can start out thick and become thinner as they radiate outwards.
Step 3) Use key words to label branches
Print key words onto each main branch to convey your topics potently and succinctly. For example, each main branch of your career development map might represent key career-related topics such as your skills, lifestyle, opportunities, interests, strengths, weaknesses and so on. Ideally the word or image should be the same length as the branch it sits on. Leaving ‘empty’ length at the end of a branch can disconnect the flow of the thought process.
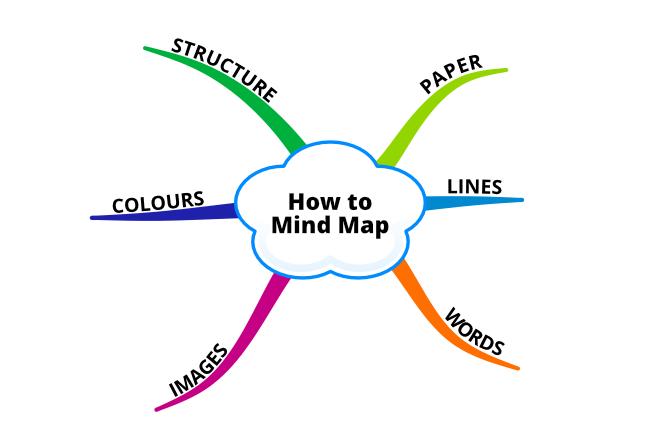
Step 4) Connect sub-topic branches
Next, draw thinner lines off the end of the main branches. These will reflect your sub-topics and supporting information, and will flow naturally from the main topics. Continue to branch out with progressively thinner branches, adding more detail and associations as you see fit. As an example, under the ‘Skills’ main branch, you might have the following branches: Individual, Team and Practical. Under the ‘Individual’ sub-branch, you could explore further to identify the following third level branches: Technical, Motivation and Social.
Step 5) Use images, symbols and colour where possible
Try to use images as much as you can throughout your Mind Map. Where possible, use them instead of key words on branches to add visual impact to specific topics and imprint your thoughts. If you find it difficult to draw images, use patterns or shapes in your words. Also, add symbols, colour or codes for extra meaning.
Step 6) Show relationships within your map
Once all your ideas are displayed in Mind Map form, it becomes easier to identify patterns and linkages between information in different parts of the map. Use relationship arrows to visually show how these different topics connect with each other. The arrows automatically guide your eye and give spatial direction to your thoughts.
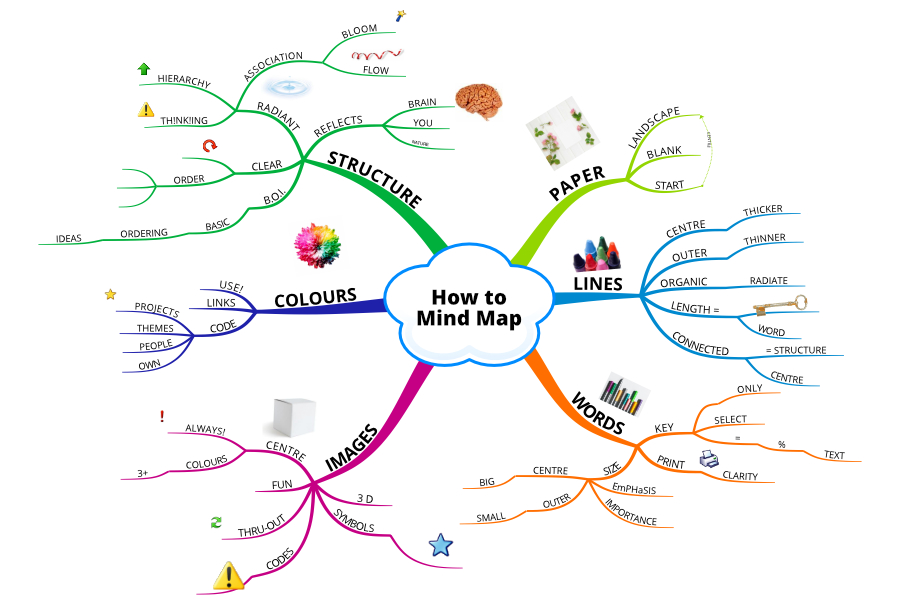
Step 7) Highlight important topics
Adding highlights or boundaries in the form of clouds or other outlines can make specific topics or ideas ‘stand out’ visually against the rest of its content. This makes them easier to remember and communicate to others. Our short-term memory is on average only capable of storing seven items of information and so ‘chunking’ information in this way can help us use this storage space more effectively. Simply surround a topic branch and/or its sub-branches with an enclosed shape, ideally containing a different background colour.
When you’re first learning to Mind Map, it’s a good idea to stick to these guidelines as much as possible as they provide a reliable and consistent framework for your thinking. Once you’re comfortable with the process, feel free to experiment and develop your own personal style to make your maps more meaningful. Above all, remember to have fun! Taking enjoyment from the activity has a hugely positive impact on your overall outcome.
Exploring Mind Map Examples
For those new to mind mapping, looking at examples of actual mind maps can give you some perspective on their versatility. Mind Maps help project managers break up large-scale projects into tasks, and students use mind maps to hone study materials and increase retention rates by up to 32%. Business analysts often draw mind maps in a structure that allows them to visualize markets and strategic analysis. For example, a marketing team can draw up a mind map with branches for audience, channels, messaging, and metrics to identify relationships and opportunities.
Mind Map examples come in every kind of situation, from schools to Fortune 500 organizations. According to medical schools, mind maps help students learn complex content 10-13% faster than traditional notes. The mind map format allows information to flow as naturally as possible in our own brains.
Using Mind Map Templates to Increase Efficiency
Mind map templates can be a useful starting point for several reasons. When developing a project, for example, or preparing for a meeting, or for yourself, you’ll be able to cut your time and effort significantly by starting with a tried and true mind map format. In studies, teams using pre-existing mind maps complete tasks 25% faster than those utilizing an entirely new mind map.
The best mind map templates strike a balance between organization and openness. Templates could have branches for situational awareness, issues, new possibilities, and next steps for brainstorming. Timescales, resources, milestones, and obstacles are often included in goal-setting mind map examples. These templates are flexible to adapt to a particular scenario and still maintain established mind map principles.
Structure and Success Habits for Mind Maps
It is critical to build good mind maps by identifying basic structural principles. From the primary branch, starting from the core concept, primary branches are used for main topics, and secondary and tertiary branches are used for background details. In fact, using the right mind map pattern is shown to increase memory retention by as much as 32% compared to traditional note-taking.
Top mind map practices include: Single keywords instead of phrases, using colors for classification, and spacing your thoughts in a clear manner. In fact, mind maps created using these best practices are 15% more likely to be remembered than text-filled mind maps.
Enhancing Collaboration with Mind Mapping
Mind mapping really is at its best when it is done in groups. Working teams using shared mind maps find 30% higher productivity and higher engagement across the group. The imagery of mind maps opens communication loops and fosters ideas from all types of thinking.
These days, digital tools have reshaped collaborative mind mapping. Editing in real time enables multiple team members to work together, and cloud storage makes sure that everyone has the most recent version at hand. Businesses who use collaborative mind mapping tools show that they think more creatively and solve problems faster, and that 70 per cent more ideas are generated when brainstorming.
Following these mind map best practices and using appropriate templates will help you build powerful visuals that support learning, planning, and communication. Be it on your own or as a team, the discipline and nimbleness of mind mapping makes it an incredibly powerful tool for brainstorming and success.
Ayoa simplifies the process of creating mind maps by providing an intuitive, user-friendly platform that enhances brainstorming and organization. With its AI-powered features and collaborative tools, Ayoa allows users to visually structure their thoughts, making it easier to generate ideas, plan projects, and improve productivity. Whether you’re a student, professional, or creative thinker, Ayoa offers a seamless step-by-step approach to effective mind mapping.
Chris Griffiths
Chris Griffiths, is a bestselling author with decades of experience in the areas of creativity, metacognition and innovation. His books have been published in over 20 languages and his previous title ‘The Creative Thinking Handbook’ was selected by Forbes as one of the best books to “get your creative juices flowing” and named the #1 business book for inspiring innovation by CEO Today. He is an advocate of using technology to improve thinking, and his latest app, Ayoa.com, is used by millions worldwide.